Sunday, March 31, 2013

Time to Move On - the Transfer of my Blog

If you have visited this site recently you'll notice that it's no longer updated. I had intended to keep this blog running in parallel with the blog on my web site at www.johnbirchphotography.com for a while, but to be honest it's difficult to find the time to do that. It is with regret then, that I no longer intend to update this site with any new postings.

All the old blogs postings, comments and information have been transferred to my new web site, so you can still find all of the old stuff there. I'll leave this site up or a while but would ask you to bookmark my new site if you want to read the older postings as well as my new stuff. Blogger has served me well, and there are many good things I really like about it, but I feel Worpress is a better platform to take my photography web presence further.

Many thanks for reading.

John R. Birch

www.johnbirchphotography.com

Thursday, November 1, 2012

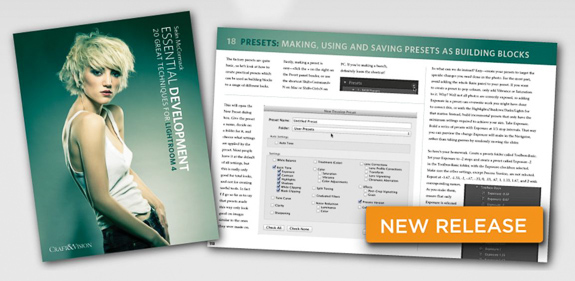
Essential Development - 20 Great Techniques for Lightroom 4

New Book from Craft & Vision

There is a new eBook offering from Craft & Vision entitled Essential Development - 20 Great Techniques for Lightroom 4. It's also by a new author to the Craft & Vision stable, Seán McCormack, who many may recognise from the Adobe Lightroom forums and for his regular Lightroom Blog at Pixeq. Seán has been involved with Lightroom since the early beta versions where his forum activity of attracted the attention of Adobe. He was subsequently invited to become a Lightroom beta tester and has been involved with all Lightroom editions since. Thus he has a well established pedigree as an authority on Lightroom.

I've been an avid Lightroom user since those early beta versions too, having migrated from the original Rawshooter program by Pixmatic (where Adobe acquired the original Raw processing software). In that respect I'm no novice and would probably consider myself an advanced user, so I did wonder whether I'd have much to gain from yet another Lightroom tips booklet. Well, as you'll find out I was quite pleasantly surprised.

Read More >>

Tuesday, October 16, 2012

Big Stopper Shocker

The Ultimate 10 Stop Filter

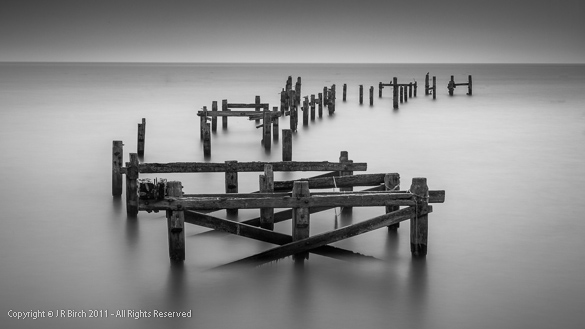
Remains of the old Swanage PierI've owned a Lee Big Stopper 10-stop filter for almost 2½ years now and have become quite a fan of long exposures and the effects that this filter can produce. It's become a staple accessory to many a photographers kit bag and it opens additional artistic opportunities to a landscape photographers day once those golden hours have disappeared. Prior to the Big Stopper I used a B+W 10 stop filter, which is of the screw-in type,

Wednesday, October 10, 2012

The Worlds Top 10 Most Expensive Photographs

It doesn't seem so long ago when I was discussing a picture by Australian landsscape photographer Peter Lik with a group of fellow photographers, that had sold for a million dollars. Having been to Lik's gallery in Las Vegas and witnessed the crass commercialism first hand, I guess I wasn't too surprised. But only in America hey? However, something the other day made me want to find out what was so appealing about that picture as to command such an amazing price. During my research I was stunned to find out it's now not even in the top ten most expensive photographs in the world today.

Friday, June 1, 2012

Adobe Release Lightroom 4.1 … but Disappointment for Flickr Users

Lightroom4

Adobe have released an update to Adobe Lightroom with version 4.1 available for download which is free to registered users. Version 4.1 brings support to several new cameras (notably the Canon 5D MIII, 1DX, and Nikon’s D4, D800 & D800E), some bug fixes, new lens profiles, and rather surprisingly, some new features too. This was not dissimilar to the release of Lightroom 3.1 which also added new features, presumably some which were still incomplete at the time of the official release but which the team wanted including. New features include the ability to process 24 and 32 HDR files, save photobooks as JPEGs, and publishing via Adobe Revel. Also greatly enhanced are the colour fringing tools where the user will notice several changes to the Lens Correction panel. Details of the release can be found here.


First Looks

Many of the changes are of no surprise of course since Adobe made RC (Release Candidate) versions to users for beta testing with Lightroom 4.1 RC2 being the version prior to the official release. However, I didn’t participate in any of the beta testing and hadn’t road tested either RC1 or RC2, so my first taste of version 4.1 was the official release. My first impression was one of much improved performance on Windows. I found version 4.0 ran pretty smoothly on my Macbook Pro but stumbled along on my Windows 7 desktop (Intel Quadcore 2.4 Mhz, 8GB Ram, 64 bit) and found myself frequently watching and waiting as the little circle span around on my screen. Again I recall a similar experience with LR 3.0 which didn’t improve on Windows until version 3.1. Now my windows version is much more snappier. I discussed just this point with several photographers whilst in Iceland last week, who reencountered similar experiences. It seems the initial Adobe Lightroom release may be optimised for Mac OS, and us poor Window user have to wait a while longer .. who knows, but it certainly seems that way.


imagePerformance aside, the big change is in the Lens Correction Panel, where the Remove Chromatic Aberration has been placed on a separate Colour page, with Fringing gets it’s own page and a set of Defringe controls, comprising two amount sliders (Purple Amount, Green Amount) and two hue sliders (Purple Hue, Green Hue). The former are conventional amount sliders, the latter two are “split” sliders and will present a new type of control to most Lightroom users, but basically allow you to control the amount and hue of the defringing. I find simply clicking the check box works liker a dream on just about all of my pictures and is a fantastic new tool. It’s made a big difference to removing some colour halos on some of my old photographs too. The tools are the work of Eric Chan and if you want to find out how to really get to grips with this new functionality then you’d better read his post here.


Disappointment for Flickr Users

If like me, you frequently post to Flickr via the Publish Service Adobe Flickr plugin, then you could be in for a surprise. There was a well documented bug in the 4.1 RC1 version where if you had double space or CR characters in your caption field (which Flickr is added as your description), then then photo would fail to export, as would any export to Flickr presenting a “Can’t Update this collection” error message. This was supposed to be addressed by adobe in RC2, but it appears the bug is still present in the final 4.1 Windows release version. You can get around it of course by removing the offending characters or not having any caption text, but if you’re like me and like to format a full description in a word processor and paste it into the caption field then you’re in for a shock. I’ve been trawling the forums to see if there are any work-arounds, some of which have suggested disconnecting from Flickr and re-authenticating the account but this didn’t work for me. I can still post to Flickr sans-caption, but to loose this functionality is very disappointing. I’ve also noticed that Flickr doesn’t recognise my GPS data added to photographs in the map module so would be interested to hear if anybody else has encountered similar issues. I just hope we don’t have a long wait from Adobe for a fix.


Resources

Thursday, January 12, 2012

Free Lightroom 4 Beta Video

image

If you thought yesterdays post of Lightroom 4  beta resources wasn’t enough to get you started, well here’s another one for you. It’s another video, or rather a collection of videos over at the well known online training library at Lynda.com. I’m not a member or subscriber but this video is 1 hour 50 minutes of a Lightroom 4 Beta Overview from Chris Orwig and it’s free.

It’s split into many short segments each covering a specific top of LR4 beta so is a very useful resource. I haven't watched it all yet but found the section soft proofing and books very useful. You can find the videos listed here.

Free Lightroom 4 Beta Video

image

If you thought yesterdays post of Lightroom 4  beta resources wasn’t enough to get you started, well here’s another one for you. It’s another video, or rather a video collection of videos over at the well known online training library at Lynda.com. I’m not a member or subscriber to lynda.com but this video is 1 hour 50 minutes of a Lightroom 4 Beta Overview from Chris Orwig and it’s free.

It’s split into many short segments each covering a specific top of LR4 beta so is a very useful resource. I haven't watched it all yet but found the section soft proofing and books very useful. You can find the videos listed here.

Wednesday, January 11, 2012

Lightroom 4 Public Beta - Online Resources

image

It’s been just over 24 hours since the release of Lightroom 4 Beta and already there are a multitude of reviews, resources, discussions, tips and video’s online already. If you are an existing Lightroom user and haven’t downloaded your FREE copy of LR4 beta, you can do so now from Adobe web site here. If you’ve never used Lightroom then this is a great opportunity to start right now and have of a free copy at your disposal for a few months.

But where do you start? If you’ve just downloaded and installed your LR4 beta copy you may be a tad confused on opening up the new version. New modules like Map and Book are pretty obvious, but what about the other, more subtle changes and how do you use them? You may be confused about how to use the new Develop module Basic panel, or like me you may be confused why the Basic panel looks exactly the same as it did before (tip: you need to update the Process to 2012 in the Calibration panel first)? Well don’t worry as there are already many good resources out there and many from the official Adobe testing fraternity who have been involved with the development and have had time to prepare their posts ready for yesterdays release day.

Adobe’s official release notes can be found here, but if you are looking for a really good explanation of the new features then excellent postings from the Computer Darkroom and dpreview are probably an ideal place to start. Personally I like video instruction as I find this the quickest and easiest way to get up to speed with new features, and in this Adobe have already provided a comprehensive online library of 8 videos on the Lightroom 4 beta at Adobe TV. If you can put up with the rather irritatingly squeaky voice from Adobe’s Evangelist Julieanne Kost who presents these videos, and don’t get fed up with the glaring abundant overuse of the word “Excellent” (sorry Julieanne!), then this is the best video resource for LR4 beta so far.  And lastly don’t forget to check out Michael Reichmann’s 22 minute long video overview on the Luminous Landscape and the series of videos from Matt Kloskowski and Scott Kelby at their NAPP Lightroom 4 Beta Launch Centre. These together with a few other resources I’ve found useful I’ve listed below. Enjoy beta testing!


Reviews and New Features

Forums

Resources

Videos

Tuesday, January 10, 2012

Lightroom 4 Beta Available for Download.

image

Well it’s here, Adobe have today released the beta version of Lightroom 4 and it’s available to download from their web site here. I haven’t had much of a chance to play with it so far, but the big new features seem to be Video support (which is not really of much interest to me, but no doubt very commercial), GPS support, new shadow and highlight controls, additional local adjustment controls and the much requested soft-proofing. Adobe’s summary of the new headline features is as follows:

  • Robust Video Support
  • Manage images by location with the Map Module
  • Simplified Basic Adjustments
  • Powerful new Shadow & Highlight controls
  • Additional local adjustments including Noise Reduction and White Balance
  • Soft Proofing Reinvented
  • Elegant Photo Book creation
  • Email from directly within Lightroom
  • Publish videos directly to Facebook or Flickr
  • Enhanced DNG workflows
  • Adobe Revel export workflow

The GPS support includes integration with Google maps. The Develop module has a new engine with a 2012 Process version, and the local adjustments now include noise reduction, temperature and tint, shadows, highlights and moiré. The clarity slider has been refined to help reduce artefacts and after such a long, long wait, soft-proof has finally been introduced to Lightroom including both paper and ink simulation. Soft-proofing has been a much requested feature and it was way up there on my list, so hopefully at long last I won’t have to waste so much expensive photo-paper trying to get my prints look like the screen version.  There’s also book creation direct from Lightroom and tight integration with Blurb printing services.  A full list of the changes, new functionality and enhancements can be found in Adobes release notes here. Some notable absentees are face recognition, and improved slide shows so lets hope Adobe are saving those the final release version. Face recognition is a much heralded feature of Aperture so I’d be surprised if Adobe didn’t match its functionality in LR4, and improved slide shows have been a very much requested feature on the forums.

As ever, don’t use this with your existing catalog as it is only a beta version and things could go wrong. Adobe list some know issues in the release notes. Back up your catalog first, and remember this is only to test drive the new functionality an not meant to be a perfect, fully working copy.

Sunday, January 8, 2012

Star Rating your Photographs

Lightroom Star RatingsI recently returned from a once-in-a-lifetime photographic trip to the Antarctic Peninsular where I shot almost 7,500 frames in under 6 days. A phenomenal number of frames by anyone's standard, but as a member of a 73 strong group of photographers my frame count was probably on the low side, and probably very low compared to some I saw. At the end of our trip, during one of the lectures from one the lead photographers and organisers, we we asked to raise our hands if we had captured any 5-star images. The vast majority of the party raised their hands, but I did not. That got me thinking about what exactly constitutes a 5-star image and is what I consider a 5-star image similar to those other photographers? … apparently not so it would seem. Don’t get me wrong, I did acquire many good images that I’m perfectly happy with, but just not quite 5-star images in my book.

Assigning a Rating

Of course when I talk about star ratings I’m referring to the system of being able to assign a rating from zero to 5 stars to a digital image, usually in a DAM (Digital Asset Management) program such as Adobe Lightroom, Apple’s Aperture, or Adobe Bridge. It’s not just stars you can assign either, you can flag a photograph as a pick or reject and also assign colours, but for most the system of assigning stars seems to be the favoured method of rating their photographs. Star Rating ToolbarI’ll refer to Adobe Lightroom from now onwards, as this is my preferred DAM/RAW processor of choice, but it’s similar to the others mentioned above. In Lightroom you can assign star ratings in the Library or Develop modules simply by pressing the numeric keys from 0 to 5 to assign none to a maximum of 5 stars to an image, but if you prefer you can us the mouse to click on the star icons in the toolbox to achieve the same end (Tip: you can show or hide the Toolbar by using the T quick key). Rather interestingly, using keys 6 through to 9 will assign the colours red, yellow, green or blue to the images respectively, although there doesn’t appear to be a quick key to set the last colour purple. Thus it is possible to rate an image, albeit rather quirkily, from 0 to 9, although I don’t know any photographers that do this. Note that if you also hold the shift key down whilst pressing a numeric key, the image will be assigned the appropriate star or colour rating and then next image displayed, thus allowing you to move through your image collections whilst rating them. You can also use the right or left square-bracket keys to promote or demote the ranking of an image.

The Rating Process

For most photographers a simple system of assigning 1 to 5 stars seem to be the most common form of rating, with no stars left for unrated or un-judged photographs, 5 stars reserved for the very best or portfolio quality images, and ratings in-between for images of varying quality. But what actually constitutes a portfolio image, and what distinguishes a 3 star image from a 4 star image? Do photographers simply apply a varying degree of quality assignment from visual inspection on the computer monitor? Well talking to several, it would seem that’s exactly what they do. However when asked it seems very few could elaborate in any detail how a 2 star image would differ from a 3 star image, or a 3 star from a 4 star image. Poor images and the very best images are probably the easiest to rate, but those in-between are not quite so easy and it seems that most ratings rather depend on how the individual photographer assesses the image on screen at one particular moment in time and then simply prescribes an arbitrary value of 0 to 5. Of course there is nothing wrong with this type of assessment as this system obviously works and perhaps is all that is required for many photographers. Our poorest and very best images are usually the most obvious to us anyway, but how often have you revisited an image at a later date and changed the rating? I’m sure almost all of you have done that at some time, and perhaps down graded images and upgraded some images in a later reassessment. It’s clear that rating images can be a very subjective, emotional and perhaps an emotive process for photographers.

As digital photographers, let’s be honest, we all tend to shoot a vast amount of images, far more than were ever acquired when we shot film, so it’s no surprise that sometimes good images can be often overlooked or missed out on our initial assessments. A common process is to find the first good image in a sequence of similar images, and commence work on that one, without perhaps, fully inspecting the rest within the sequence. I know I’m frequently guilty of this myself. Time constraints, computer processing time, library size, the sheer abundance of similar images and good old human nature lead us to a propensity in selecting that first good image. Often that first good image tends to jump out at us on screen too, but it may not necessarily be the absolute best image in the sequence. I remember attending a talk once, from a well known British wildlife photographer, who stated that there will be only one 5-star image from each shoot, that his 5-star image he keeps and then he deletes the rest. I didn’t believe him for one minute and although he may be profoundly adept at selecting the one that sells, it’s only human nature for us to change our minds at some point, and surely there may be other images that suite other commercial purposes, even if not quite as good. Perhaps it was just his stage bravado and showmanship talking.

My Rating System

So if not a pure numeric quality rating of zero to 5, then what else? Well I like to rate pictures according to what their use may be together with the actual quality of the image, so my star ratings encompass a range of criteria. For instance I may have an image that I really like that is a great composition, with good light and mood, is well exposed, but perhaps not perfectly sharp or the focusing is slightly off. I know the image is not high enough quality to make a large print, but it may be perfectly suitable for or an A4 or 10 x 8-inch print, and if not good enough for that it may perhaps produce perfectly adequate 5 x7 or 6 x 4-inch prints. I wouldn’t want to delete the image just because it’s not of the absolute best quality. Some of my images I know are probably not good enough for printing at all, but they have a sentimental value or may perhaps be suitable for use in and AV presentation or video, where I don’t need anywhere near close to the capture dimensions as it will be only ever displayed on a computer monitor, or in a video at only 720 resolution or even on an iPhone. This then, is the rating system I now use that works for me:

  • No StarUnrated: Images that have not yet been evaluated.
  • One Star – Neutral/Keepers: Images that are neither good enough for slideshows, or printing, nor flawed enough to be deleted. These may have sentimental or documentary value or snapshots I just whish to keep.
  • Two Star – Good: Images good enough for 6 x 4 or 5 x7 prints and slide shows at 100%, but perhaps not really good enough for full size prints at 300 dpi.
  • Three Star – Very Good: images I like that that are considered to be very good, are technically sharp at 100% and and can be printed at A4 or 10 x 8 in without loss of resolution.
  • Four Star – Excellent: Images I like, think are really good, are sharp at 100%, are technically and compositionally very good to excellent, and good enough for full size prints at 300 dpi.
  • Five Star – Portfolio: Portfolio quality images that I consider are my best photographically and technically and are suitable for extra large prints (24 x 30-inch) and of commercial or exhibition quality.

My rating system has evolved over several years using Lightroom but is now part of my regular workflow, however many (most in fact) of the images in my Library still have zero stars (as yet) and remain unrated. I tend to skip to my better images, rate those and process those images first. In an ideal world I’d return to evaluate, cull or rate all my zero star images, but in reality I know that’s a pipe dream as I know for me it will be impossible to ever achieve that. Hard drive space is relatively cheap these days and as long as my Library size doesn’t effect the performance of Lightroom then I won’t waste an excessive amount of time on trying to cull all the redundant images. Obvious inferior images, those out of focus, badly exposed, and those beyond redemption I may skip at import, or cull immediately after import, but I don’t worry about leaving a huge amount of unrated images within my library folders. I will however, generally try to apply some basic keywords to a shoot (folder), then even the zero-star images may have a chance appearing within a future subject search and may of course provide some pleasant surprises. I tend to use the pick and reject flags after an initial import to highlight the good and the bad, and then apply star ratings to the picks and delete rejects.

You’ll notice too that I don’t use colours for ratings either. I use colours to denote different file types, HDR and panoramic images, but that’s just me. I know some photographers use colours for portfolio shots, or for certain clients or commercial ventures, and to this effect, colour labels seem well suited. I do like the way you can specify your own colour label set in Lightroom and then when you hover your mouse pointer over the each colour in the toolbar, a description of your setting is given in the tooltip; I only wish you could do the same for your star ratings.

Differentiating my 3 star from 4 star images is probably the most subjective part of my system. I may have some images that (to me) possess a wow factor visually but are technically flawed which limits their usage, so they may get down graded to 3 stars, others may be technically perfect but lack a wow factor and but may still achieve 4 stars since they are capable of being printed at large sizes. Portfolio images are usually obvious, and for me they must have a wow factor. There are many times I've thought I have captured a wow image only to find image deficiencies prevent it being rated with five stars once assessed on a computer screen. Thus I have a limited number of what I consider true portfolio images. I’m probably a harsh critic of my own images and perhaps lack a bit of confidence in my own abilities but that’s just me. However I do re-visit library folders occasionally to review my 3 and 4 star images and I sometimes find the odd 3 star image I think now perhaps now worthy of 4 stars or vice versa.

Blog - Antarctica Template

Five Star Images

So that brings me back to my Antarctic shoot and why I haven't rated any of my images as 5-star (yet!). Well, I guess I addressed some of the reasons in the paragraph above. I did acquire many good images, and many that I like and that I’m quite pleased with, but for me none of them just quite possessed that wow factor and some fell short on image quality. As a collective I think they look good (you can judge for yourself by visiting a gallery of some of my favourites here), but to me there are no individuals that really stand out as 5 stars for me. It’s also incredibly easy to be wowed by such an amazing location as Antarctica as it is indeed one of the most impressive places on planet earth. I looked at many Antarctica images prior to my visit, many which then I really thought had that wow factor, but now some don’t seem quite as impressive since I’ve been there and attempted some myself, but I guess that can be said when you’ve photographed any iconic location. The old idiom, “familiarity breeds contempt” often springs to mind, but it’s often the place, not just photograph of the place that is the wow factor, and that certainly rings true for Antarctica.

That aside, I think perhaps many of my fellow shipmates perhaps rate their 5 star images more equivalent to how I rank my 4-star images. For me 5 stars must remain “the very best of my very best” and something I feel is quite special.

Summary

Rating your photographs is a very subjective and emotive process. There is no one correct system and what works for one person may not for another, so what ever you have developed may probably be the right system for you. Remember also that ratings don’t just have to be on photo quality or a “marks out of 10” system for an image, but can include other criteria such as how an image will be used. The key is to define a set of rating criteria and try to be consistent in your method. Occasionally think about revisiting and re-evaluating some of photographs from time to time, check to see if you missed some hidden gem, or been too harsh or lenient with others, you may just get some surprises.

If you have an interesting way of rating your pictures leave a comment and let me know.

Sunday, January 1, 2012

Lightroom 4 Beta Soon ?

Lightroom 4 Beta

Lightroom 4 Beta to be released soon?

I was recently on a Photo workshop with a well known Lightroom beta tester who also writes books on a particular aspect of Lightroom. He let slip his new revised book on Lightroom 4 is set to be delivered to his publisher in February 2012 and that we should seeing a Beta version of Lightroom 4 released very soon. He also intimated that there may be a few surprises in store especially with the Lightroom user interface, but he was pretty tight-lipped about exactly what those surprises would be. He had a beta version of LR4 on his laptop but of course we didn't get to see it! He indicated that the released beta version would probably only contain around 60% of the functionality of the final release version so we can expect additional functions to be included at release time.

The Evidence

Other glimpses of a beta version have been observed on the web also with Sean Reid’s review of the Fuji X10 on Luminous Landscape where the RAW files were apparently converted in a beta version of Lightroom. Also keen eyed followers of Matt Kloskowski’s Lightroom Killer Tips, have spotted a files called LR_4.0_796371_osx10_Release_Installer.zip and LR4R15ReleaseNotes.pdf" in his video release on December 12th 2011, so make of those what you will. Perhaps the final release is closer than we think although I somehow doubt that.

Of course, programming new features, and especially debugging and refining them even after beta testing can be a tricky and time consuming art, so don’t be surprised if the time fame gets extended, but it certainly looks also we should be getting a beta version sooner rather than later.

What New Features to Expect?

The question now of course is what big new features can we expect to see in LR4. Judging from comments made by Jeff Schewe in the recent video release "From Camera to Print & screen" from Luminous Landscape, soft proofing (much to Jeff’s seemingly apparent annoyance) was dropped from the LR3 release at the very last minute, so I’d fully expect it to play a significant role within LR4. Soft proofing was a pretty major part of my wish list for Lightroom 4 as I still have problems getting my prints to match the screen version and I know many other photographers still do too. My wish list (which can be seen here) also contained GPS support, a keyword manager,  face recognition, and improved cloning and healing tools to name but a few. Certainly the later seems to have been a firm favourite around the forums together with improved local adjustment tools to include vibrance, white balance,  fill light and individual HSL controls. There’s a multitude of GPS devices around now too so that may just have caught the LR boffin’s eyes, but it’s certainly not on everyone’s list. There have also been many requests to add Photo-stitching for panoramas and HDR blending for HDR, but these require computational intensive algorithms and personally I can’t see them being included in Lightroom as they seem more suited to Photoshop.  Face recognition is popular in many other photo-packages now including Lightroom’s main rival Aperture; I’ve tried it and it’s a very useful too, so that would be a great addition to see.

Scott Kelby posted his wish list on his blog site in August which of course got a lot of attention and enough comments were left to justify another article on the most popular feature request for Lightroom 4. He also mentioned that the Lightroom developers were listening, so I wouldn’t be surprised if some of the most popular features request are included.

Let's hope there's not long too wait.

Wednesday, October 19, 2011

Why Aren't Extended Timer Facilities Built-in to my DSLR?

On the weekend whilst photographing the limestone pavement on top of Malham cove in the Yorkshire Dales I lost my remote timer switch. It was dangling from my camera and got tangled up in my tripod legs as I was moving my tripod; one of the legs closed, snapped the timer cord out of the socket on the side of the camera which then disappeared down one of the deep grykes in the limestone pavement, never to be seen again. Thankfully it wasn't an original (and very expensive) Canon TC-80N3 remote timer; my original TC-80N3 bit the dust last year when I managed to dangle it in salt water on a Scottish beach, this latest disaster was a only a considerably cheaper eBay clone.

Canon TC-80N3 Remote

However, this recent disaster got me thinking, why am I using a remote timer like this in the first place? I know part of its use is to isolate camera shake, but my main reason is so I can take longer exposures than the maximum of 30 seconds using the settings in the camera alone. Like a whole host of other landscape photographers I enjoy taking pre-dawn and sunrise shots, where the light levels are low and exposures times are long, often well in excess of the limiting and punitive 30 seconds maximum allowed by the camera settings.  As landscape photographers we are always being told that the best light to be had is within Golden Hours, that magical time around sunrise and sunset when the sun is below or only just above the horizon and suns light takes on a wonderful, golden, warm hue as it is filtered through the low atmosphere. Are there no landscape photographers at Canon? Does no one at Canon take exposures longer than 30 seconds?

My 5D Mark II is a sophisticated beast, with way more processing power than several of my early PC's no doubt (8086 processors .. remember them?), so why do I need a clumsy, dangly, plug-in wired contraption to take long exposures. Well I don't I hear several of you say; I can just put the camera in bulb mode and time my exposure; my 5D MII even has a second counter on the LCD display on the top, but that's if I could see the dam thing. Yes well, right, but that's not the point. The point I'm trying to make is that surely all the functionality of the TC-80N3 remote timer could (should) be added to the Camera by a simple firmware upgrade? The processing power is surely present in-camera already, probably the software functionality too, but I somehow doubt the if willingness is there for Canon to implement these features.

If you've never used a remote timer then perhaps you've missed out. Apart from being able to set exposure times from 1 second up to an incedible 99 hours, 59 minutes and 59 seconds, you can set similar values for the self timer (time before the shutter is activated), the interval timer (time between exposures) and exposure count from 1 to 99 exposures, although I'm not sure why the exposure count has been limited to just 99 exposures.  Thus with the TC-80N3 you can takes exposure of almost any length which is ideal if you happen to be a fan of using a 10-stop ND such as the Lee Big Stopper, low light photography at sunrise or sunset, or even astrophotography. I particularly like the ability to set the self timer to any value since if you ever tried shooting landscape with a 70-200mm zoom or any other long lens, then tripod vibration can be a big problem, so allowing a long rest period before the shutter is activated can improve sharpness considerably. God knows why you can only choose 2 or 10 seconds for this in your camera; surely we should be able to set any value?

It's funny how when every new camera is released that the makers focus (no pun  intended) largely on new features rather than improving existing ones, and much has done with movie features. We seldom see major changes in firmware to change old functions. Really we shouldn't need a device like the TC-80N3 remote timer, all that functionality should be in-camera, and  the most required would be a simple cable release remote cable. All this functionality would be a doddle for Canon to implement in a firmware upgrade but I get the feeling they would much rather you buy their over priced accessory. Thankfully their are many remoter timer clones to be bought on eBay and Amazon nowadays at less than a quarter of the price of an original Canon. I've tried a few and they are just as good, if perhaps not quite as good in build quality, but at a 75% saving surely sales of the originals must have plummeted.

I'd love Canon to take note but won't hold out my hopes; they seem obsessed with making our DSLR's into movie cameras these days. Some of us continue to be stills photographers!

Monday, October 17, 2011

Digital Landscape Photography by John & Barbara Gerlach

Book Review

I used to buy quite a lot of photography books, too many according to my wife, but not so many these days. My recent acquisitions are mostly coffee table books from photographers I really admire and aspire to. It’s been a while since I bought anything to do with technique. That’s not to say I think I have perfected my techniques, far from it indeed, it’s just that most books in this category are firmly pitched at the novice or endless photo manipulation in Photoshop. This one I’m pleased to say that Digital Landscape Photography is a little different from the ‘norm’ and focuses on good technique and capture process in the field.
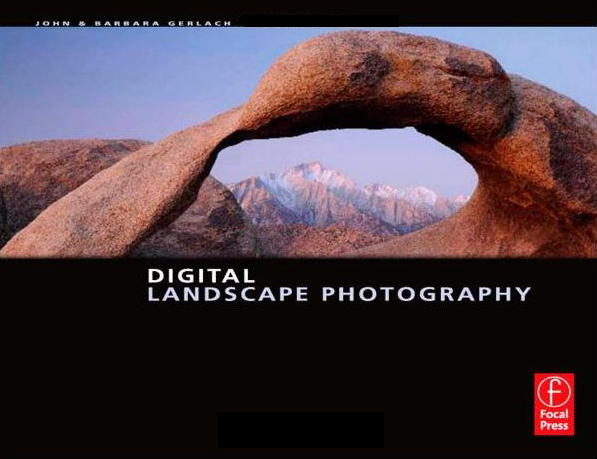
John and Barbara Gerlach have been professional US photographers for over 25 years, so they bring a wealth of knowledge and experience to this book. They are unusual in that they are a photographing couple and their Wildlife, Nature and Landscape photographs have been widely published in Nature and Photographic journals in the USA since the 1990’s. Rather, strangely (and perhaps expensively), they both use different equipment, one favouring Canon whilst the other uses Nikon equipment (I guess it’s stops fighting over lenses!), so Camera references in the book usually cover both makes and thus will appeal to both Canon and Nikon users.

The book commences with an introduction and chapter stating that landscapes are all around us and if look hard enough we’ll find interesting landscapes near where we live. All well and good if you live in certain parts of the USA (they live in Yellowstone), as the photographs within the book display, but not always the case for UK residents, well not quite as spectacular perhaps. The Gerlach’s stress the importance of revisiting a scene through different seasons of the year and under different conditions, and present a mission statement for the book to enable the reader to learn how to capture high quality, exciting, ditgital landscape images in the field.

Cameras, Accessories and Lenses Choice

Chapters 2 and 3 deal with equipment, but I guess by far the majority of readers, if not all, will have already bought their equipment, so for them there is little new here. However, if your upgrading then there is some good advice here. There is one point on which I firmly agree with the Gerlach’s, if you are a landscape photographers and like to make large prints then megapixels do count. I get fed up of journals stating the pixel count is not important, it is. An 8 MP Cameral may produce excellent A4 prints, but if you want A3 or larger then 16 or 21 MP will capture more detail and give scope to crop. These chapters briefly cover functions you may need for your digital landscape photography, such as using RGB and luminance histograms, the LCD monitors, self timers, cable release, camera custom functions and memory cards.

Chapter 3 deals with lens choice and weighs the pros and cons of professional quality glass against consumer quality. Lens choice for most amateurs is typically related to budget and target output, but believe me, once you’ve purchased your first professional quality lens, you’ll never want to settle for less. There is no free lunch with lenses. Zooms versus Primes are discussed, and the Gerlach’s now favour modern zooms over primes. They state the additional quality gained from primes is now minimal compared to modern day professional zooms, and zooms provide so much more scope in creativity and framing your shot, so are in effect, of far more use. Filters and lens protection are also mentioned, as is caring for your lenses. Good stuff for the beginner but nothing new for a seasoned amateur.

Technique

Chapters 4 and 5 are all about technique and here the book really starts to shine. Chapter 4 provides over 20 pages on Mastering Exposure, and if there was anything you were perhaps unsure on, you’ll most probably find it explained here in truly practical fashion. It starts from the basics but is beautifully and concisely explained whilst still being exceptionally readable. It explains how to use your histogram and expose to the right. One point I gleaned from here was to always check your histogram in RGB mode and not just luminance mode as you may be clipping one of the individual channels which may not be visible in the luminance histogram. What I really like about this book is that there are practical examples given where the Gerlach’s show how they take their photographs. The Gerlach’s tend to shoot in manual mode, but other methods are covered fully too.

Chapter 5 is all about getting sharp images and covers lens use, lens selection, how and where to focus, apertures, ISO and shutters speeds. Hyperfocal focusing is explained too. They explain in detail how you can benefit from just selecting a single autofocus point to selectively focus on the right part of the scene, then recompose the scene to shoot. To avoid the camera re-focusing they use a method they call ‘back-button focusing’ whereby they have re-assigned (removed) the auto-focus capability from the shutter button to one of the buttons near the eye-piece. This can generally be achieved via one of the custom functions on Nikon and Canon cameras, but is something I’ve not come across before. Thus your shutter button just sets the exposure, and you use another to focus. Quite a novel method, but I achieve the same result by selectively focusing and then temporarily switching my lens to manual focus before recomposing the scene and shooting the frame.

Light & Composition

Chapters 6, 7  and 8 are about Light and Composition, with the former dealing with the qualities of light, when to shoot, polarizers, colour settings and white balance. Surprisingly the use of split neutral-density filters are only briefly touched upon and referred to as 'old-fashioned'  with the Gerlach's firmly in favour of the use of HDR techniques rather than split grads. To me this is an oversight as a set of grads is still an important part of any landscape photographers tool kit. Chapter 8 deals with shooting more unusual landscape subject such as shooting from boats and contains a good section on shooting waterfalls,  and covers Autumn colours and shooting in the snow.

HDR & Panoramas

Chapter 9 is devoted to HDR, something the Gerlachs's have embraced in their landscape photography, and it deals well with how to capture an array of images for HDR processing. For processing it only covers (the 2009 version) of Photomatix Pro, so if you use other software you are left feeling short. Some nice HDR landscapes accompany a written walk through of how to process your image but it is all pretty basic and most readers may be well advised to look elsewhere for in-depth HDR advice.

Likewise Chapter 9 touches on panoramas, with good basic advice on how to select, compose and shoot but only briefly mentions stitching software.

Summary

The Gerlach's possess some considerable photographic experience to pass on to the reader but this book is firmly pitched at the beginner/intermediate photographer who wants to take their photography onto the next level. All the best techniques are well explained and nicely presented and it would be hard not to benefit from reading this book. The emphasis is firmly on capturing good images in the field and in that it excels, but if it's post rocessing your looking for then look elsewhere.

Product Details

Paperback: 216 pages
Publisher: Focal Press (1 Sep 2009)
Language: English
ISBN-10: 0240810937
ISBN-13: 978-0240810935
Dimensions: 27.9 x 21.3 x 1.3 cm

Wednesday, October 12, 2011

Putting in a little Effort

Blog - Dunstanburgh Sunrise (Nov 2007) 1029

I've just returned from an evening at my local photographic club where we were talking about various aspects of photography, noticeably new activities to get long term and new members to socialise more and activities to get us out doing more photography, which is after all what we are supposed to be doing. Unfortunately our club is a little too fixated with club competitions. At the beginning of each new season potential new recruits arrive hoping to learn more about photography, but sadly many are are scared off after a few meetings, probably by the lack of practical, hands-on advice and the heavy leaning towards these club competitions. It can all seem a little daunting to be honest and may appear rather cliquey to some new arrivals, as I remember when I joined some 5 years ago where I too had misgivings of lasting the course. Sadly, many new recruits disappear after a few meetings and are never to be seen again, but it shouldn't be that way.

Eventually our conversation arrived on the subject of getting out too take photographs and I was really surprised to learn how reluctant members were at the thought go getting up early to go out and shoot at sunrise, and their amazement at the few members that occasionally do. For me, a major part of landscape photography is all about catching a scene in the best light, so to not attempt any photography in those magic golden hours is surely sacrilege to our art?

I know that going out for a dawn shot is not always possible, practical or even perhaps the slightest bit desirable to some, but surely everyone interested in landscape photography should attempt 2 or 3 dawn shots a year. Is that too much to ask? I can almost guarantee it will pay dividends and you see an improvement in your photography. It can be inspirational, emotional and simply down right amazing, just to be in a location when the sun breaks the horizon and witness the dullest landscape transformed into something wonderful.

I've done reasonably well in my club competitions, but not because I'm particularly adept at my craft, there are other whom I deem are far better 'photographers' than I, but I do at least make an effort every once in a while to capture that magic light when it happens. I surprise to be asked if I colourise my photographs; I may boost vibrancy in my post processing, even push it a bit sometimes, but I can't add something that wasn't there already, that wasn't captured in the camera when that shutter clicked. You can accentuate something a little, as long as it's within reason, but try adding something that wasn't there to begin with and the results are never going to look truly natural, emotive or truthful to your art.

"No pain, No Gain"

I seldom go out specifically for a dawn shoot, so you may be surprised to find out that vast majority of my better landscape shots have been done whilst family holidays, typically our summer holiday in July or August which are not really considered the best time of year for landscape photography. It does results in me creeping out of our accommodation at some ungodly hour whilst the rest of my family slumbers on, blissfully unaware at what I'm up to. But you know, it pays rewards, it inspires me, gives me a sense of elation just to see nature in all it's glory in it's finest moment of the day, and if I get to capture that in my camera, then I return to the family at breakfast time with a huge grin on my face. The day has started well. It would be such a shame to travel to these lovely locations and not to make an effort to capture it in it’s best light.

We all take a holidays once in while, so why not plan to a dawn shoot on at least one occasion on your very next holiday. Make sure you know sunrise time and direction and have an up to date weather forecast, and if you are planning a coastal shoot, do find out the tide times. Check out the location the previous day if possible and note where you can park, the paths you your location, and lookout for potential tripod spots. Take your partner or a photographer buddy if possible, and make sure somebody else knows exactly where you are going. Make sure your batteries are charged, your filters cleaned, you have your mobile phone and a good flashlight with you. And last but not least get some great shots!

Blog - Spurn Head (Jan 2011) 1041

The autumn is here, the trees have turned, and although we get many wet, dreary, cloudy days, the autumn can also produce some of the most spectacular sunrises that we get here in the UK. What’s more, then dark mornings means that sunrise times have crept forward to more respectable times of the day, so the excuse of having to get out of bed at some ungodly hour no longer holds water. Half term is approaching and soon we’re off to the Lake District for a few days. I for one will be out early mornings to take advantage of the the sunrise, assuming of course the good old British weather is kind enough!

Go on give it a go, make the effort every once in a while.

Friday, October 7, 2011

Drobo Revisited

Well it’s taken just over 2 years, 2 years 1 month to be precise, but a red light appeared on the front of my Drobo indicating that one of my hard drives had failed. In case you didn’t know the Drobo is an external storage device that houses a number of SATA hard drives sold by Data Robotics Inc. They promote the Drobo as a fail safe back-up device for your precious data, photographs,

Thursday, October 6, 2011

Last Bite of the Apple - Steve Jobs (1955-2011)


I wouldn’t normally write anything like an obituary on a photography blog but I must admit I was quite shocked to her that Steve Jobs had died during the night. I am a user Apple products however, I have a MacBook Pro (on which I’m wringing this now), an iPad and have recently acquired an iPhone, my kids have iPods and my my wife has become a bit of an iPad junky, being hooked on eBooks ever since I bought her an iPad for her birthday last year. We’re fairly recent converts to the Apple world but I wouldn’t say in any way are hard-core Apple aficionados, however it’s hard to imagine our lives without Apple now and if you don’t have an iPhone the chances are you do have a smart phone that no doubt has been modelled on what the iPhone first brought to the market.

The thing that really brought this sad event home for me was how young Jobs was. He was only 56, just two years older than me, but in his brief 56 years he’s managed to leave such a huge footprint on the modern world. He’s hailed as a visionary and he certainly had an amazing knack of knowing what would work and what wouldn’t. Take the iPad, tablets had been tried and tested before and failed miserably, but the way Apple did the tablet was just so different and so innovative it has totally changed the way we see portable computing. Now every major computer company around the globe is developing a tablet device, every major news paper, TV channel has an App, and the ‘App’ has entered our daily lexicon.

Jobs took medical leave from Apple three times, underwent surgery in 2004 and received a liver transplant in 2009, but it was only in August this year when he resigned as the Apple CEO and handed over the reins to Timothy Cook. We all knew about Jobs illness but I’m quite shocked at how little time he actually had left. Watching clips of his last Apple keynote speech on the TV this morning I realise just how thin and gaunt he looked then but he still possessed that charisma and enthusiasm in presenting the latest Apple innovations in a way in which nobody else can do. He will be a hard act to follow indeed.

Jobs certainly had his detractors and a reputation of being a real tough cookie at times. You did things the Jobs way or not at all, but with that went the Midas touch. Apple drive hard bargains too, 30% of all App purchases downloaded from the iTunes go to Apple, a big margin these days and one that the some of the newspaper publishers have found hard to swallow with several electing to go their own way. There is also that Apple arrogance too that many hate; it’s the Apple way or not at all. Look at their adamant refusal to incorporate Adobe Flash technology into iOS, their operation system on the iPhone and iPad, a technology that is already present on around 70% of the worlds website.

So what will happen to Apple now the have lost their visionary and creative leader? I can’t help but wonder. Is he irreplaceable? Undoubtedly so. Just take a look at Microsoft since Bill Gates stepped down; they have wandered aimlessly, rudderless and are now a long distant second to Apple and seemingly still in dependency. Can Apple survive? Certainly so, but can they continue to innovate and lead? I think they probably will for some time to come. Jobs legacy will continue for sometime yet.

I can still remember a day back in 1984, in an office in Sacramento, California, where I then worked as computer programmer. A large group of the company employees were all huddled around a small desk. Upon it sat one of the first Apple Macintosh computers. We’d seen nothing like it before, a windowed, graphics based, operating system, and this weird cursor-cum-pointing device … a mouse. We were all absolutely amazed at the time, now these devices are things we just take for granted and are apart of of our everyday lives.

Thank you Mr. Jobs. Rest in peace.

Monday, September 5, 2011

Mormon Row - When It All Comes Together

Photo Location

Mormon Row (Jul 2011) 1159You know the problem, as I’m sure I’m not the only one. You set out out on a photo-shoot to a great location, arrive in good time, get a great spot, set up you gear, and carefully compose your frame. Then by some magic of nature, that fantastic light you’d dreamed of suddenly appears and the scene before you is transformed. You snap away with merry abandon, filling up the memory card with an abundance of frames, not wanting to miss every subtle change in the light, thinking you’ve definitely bagged a winner since it looks great on the LCD. But then you get home and are hugely disappointed when you see them on your computer screen. With me it’s usually because I ’ve screwed up somehow, got something not quite right in camera, or more often than not, I didn’t get it focused sharp enough. Exposure problems can be usually recovered in RAW to some extent, but focussing errors, ugh .. you’re scuppered. Well enough of the bad tales, this is one location I didn’t screw up, and one I feel I got everything just right and at the right moment.

Mormon Row

The location, if you don’t know already is one of the Mouton Barns on Mormon Row, in Antelope Flats part of Grand Teton National Park, Wyoming. Mormon Row (Jul 2011) 1089It’s one of those iconic photo locations that has appeared on countless posters, books, postcards and in numerous magazines, and it's not surprising too as it really is just almost the most perfect landscape setting you can encounter. It has that amazing balance between the raw, impressive work of nature that has sculptured the jagged Teton Peaks and decaying touch of human intervention to the landscape that makes the scene so appealing.

The barns and several other buildings are all of what survives from a series of homesteads built by Mormon settlers who began to arrive from Idaho in the 1890’s. They now extrude that beautiful, natural, weathered finish on the road to decay, that now makes them seem a natural element within the landscape. Looking at the scene it’s hard to imagine that once hundreds of people lived here, as now just remnants five old homesteads remain.

There are in fact, two Moulton barns on Mormon Row, built by brothers John and Thomas Alma Moulton, but if it hadn’t been for the work of local journalist and family descendant Candy V. Moulton in the early 1990’s the barns may not have survived. Thankfully, due to her publicity bringing the plight of the barns to public attention, these iconic buildings will now be preserved by the National Park Service for future generations to see.

Getting There

Mormon Row is about 16 miles from Jackson Hole and can be easily reached driving northwards along US-191 (US-89, US-26). Allow about 25 minutes to get there. After around 14 miles turn right on to Antelope Flats Road, If your travelling out before sunrise you should just be able to make out the dark shadow of Blackrail Butte on your right, but don’t make the mistake of turning left down Blacktail Butte Road, as Antelope Flats Road is the next left after this just past the hill. Then follow Antelope Flats Road for Eastward's for 1.7 miles to the junction of Mormon Row. A link to a Google Map with directions can be found here.

There is a small gravel parking lot on the north side of the junction of Mormon Row and Antelope Flats Road, as you can’t drive along the northern stretch of Mormon Row, but from here it’s just 200 yards to John Moulton Barn along the track. 

Composition & Technique

Most all of the ‘classic’ shots I’ve seen of this barn are typically taken much further back, using longer focal length lenses, probably from locations further down Antelope Flats Road. Mormon Row (Jul 2011) 1136These compositions usually show very little foreground, typically placing the barn at the bottom of the photograph. They do however, have the advantage of showing much more of the mountains above the barn, and you can position your tripod so the apex of the barn roof aligns nicely under (or very slightly offset) Grand Teton peak, which at 13,770 ft is the highest peak in the Teton range. However, that was not the shot I was looking for as I prefer foreground interest, even at the risk of reducing the mountains prominence within the frame. I had visited the location the day before with my family, so had a chance to scout out a suitable spot and knew roughly where I wanted my tripod to be.Mormon Row (Jul 2011) 1149

As I headed out the following morning the skies were rather cloudy, and by the time I drove past the Jackson Hole airport light rain had started to fall. Luckily, by the time I arrived in the gravel parking lot, the rain had ceased, and the dim early morning light seemed to show some nice cloud formations behind the mountains. After the rain the strong scent of sage filled the air. Thick cloud was on the eastern horizon however, which cast doubts the clouds would clear before sun up. I located a nice gravel area amongst the sage brush which formed a sort of pathway leading into into the frame. To get to this area I had to cross the stream which runs parallel to the eastern side of the track, and then walk about 10 yards further south east. By the time I’d set up another photographer arrived and began assembling a 8 x 10 large format camera nearby whilst we chatted and waited for the light. My fear was that other photographers arriving would tempted to set up right in front of the barn, spoiling our view, and it only took a few more minutes before one tried. However, after some gentle prompting we persuade him ours was the best vantage point. Several more photographers arrived soon after, but surprisingly few with tripods.

The time for sunrise came and past but the light remained flat. The clouds above the Teton’s briefly took on a slight pinkish hue, but I was beginning to think ‘golden hour’ light would not reach the barn. Slowly the tops of the Teton’s appeared in sunlight, but lacked warmth and colour. The light crept down the mountain sides, lighting the range from top to bottom but no decent light fell on the front of the barn. Then, if by magic, the clouds parted and golden, warm rays hit the face of the barn and the whole scene tool on an extra dimension. The barn glowed, almost orange in colour. It was an amazing scene which I watched and photographed till the light subsided. I was last to leave.Mormon Row (Jul 2011) 1147

I used a 3 stop Lee ND hard grad (I seldom use soft grads) and found it worked best if I set the base of the grad where the top of the foreground shadow, just below the barn. When the intensity of the golden light began to fade I switched to a 2 stop. A polarizer did help a little too. My photographs were later processed in Adobe Lightroom where I further darkened the blues in the sky, lightened the foreground slightly, and made adjustments to the tone curve, contrast, and clarity. I was really pleased with the results.

Time & Season

I made my shot in late July, but I’ve read June is very good. Bear in mind this area spends a large part of the year under snow, and in the winter Antelope Flats Road is only ploughed for the first mile to a parking turnout, the rest being closed till May. I’ve also see some great Autumn shots, especially the southern barn which has a row of trees nearby where you can catch some of the fall colour. The barns face eastwards so both are great sunrise locations, the best time just when the sun clears the mountains behind and lights up the Teton’s and the face of the barns. Mormon Row (Jul 2011) 1106Generally the closer to sunrise you capture these, the better that orange glow on the front of the barns is going to be. In my case I had to wait for the sun to break through, but I loved the shots where the sun just started to catch the tips of some of the foreground sagebrush, but that won’t last long. If you’re really lucky you may even get some Bison in your scene too as they roam freely around this area of the park.

Locations Nearby

Schwabacher Landing down by the Green River is not far away, where you can get some great reflections of the Tetons at the river bend and in the beaver ponds nearby. Oxbow Bend, another great sunrise spot is just 22 miles to the north on US-191.

Resources

Friday, September 2, 2011

Monkey in The Eye

Published Photograph

Cover options

It’s always nice to get some recognition when you are a photographer, especially as an amateur like myself, so it was with great pleasure that I found out that one of my pictures had been selected for the cover page of August-September edition of The Eye Magazine. The Eye is a free bi-monthly magazine published in Uganda where I have been working and is an insiders guide to touring and travel in Uganda. You can generally find free copies in all the major hotels and on the major airlines travelling there, so it has quite an extensive circulation within the country. The Eye Magazine contains directories, maps, reviews, tour and travel information and articles of interest about Uganda. In fact it is invaluable resource for any visitor travelling there as it contains an invaluable array of information on hospitals to hotels, shops to sporting events and from embassies to entertainment. If there’s anything happening or things you need to see in Uganda it’s most probably going to be in The Eye.

The picture used is that of a young Vervet monkey and above is a montage of the various colour schemes they tried before deciding on the purple in centre of the bottom row. To be honest they all look good to me, but darker border suite the picture well. I’ve yet to see the printed copy, but hopefully they will have kept a couple of issues for me. A copy of the original photo is below.

Entebbe Wildlife Centre (Apr 2009) 1004

If you ever do get to Uganda (a fabulous place, especially for seeing wildlife) be sure to check your copy of The Eye Magazine in your hotel, it really is a good little magazine.

Friday, August 19, 2011

A Visit to the Rodney Lough Jr. Gallery in San Francisco

Editorial

IMG_0927America loves photographers. They seem so much more appreciated than photographers within the UK and photography there is truly accepted as an art form and also one that is highly collectable too. I’m not talking about fashion or news photography here either, I’m referring to landscape photography. If you had to name a selection of so called big name landscape photographers from the UK, then I’m sure Joe Cornish, Charlie Waite, and people like David Noton may come to mind, but I bet none of them come anyway close to reaping the type of financial rewards that of some of the big name American landscape photographers are able to command. For a select few, landscape photography in the USA is big, big business. Sure it’s highly commercial, and the USA is a huge market compared to the UK, and lets face it, they have so many dramatic, spectacular landscapes to photograph too. It seems everything in America is bigger and that goes for the galleries too.

IMG_0930My first experience of one of these big name landscape photographers was when I visited the Peter Lik gallery in Las Vegas whilst on holiday there a couple of years ago. Surprisingly Lik is an Australian, although his main market for pictures is within US as is a large proportion of his subject matter. He comes across as a bit like the “Crocodile Dundee” of the photography world and video clips on his website portray him running around the wilderness in shirts with torn off sleeves. It’s all rather Hollywood, very commercial and a tad unbelievable but he reputedly sold one picture for a million dollars in 2010 so it certainly pays. Can you ever imagine a Joe Cornish image ever going for that?

San Francisco Gallery

Just recently I had the chance to visit the Rodney Lough Jr. Galley in San Francisco, which opened on August the 6th this year. Rodney Lough Jr.,is another big name, commercial, landscape photographer in the US who’s gallery presence is expanding. His pictures are stunning, if perhaps a tad over saturated to the English taste (a trait rather common amongst the American photographic fraternity). The IMG_0962gallery however, which is one of several now, is mightily impressive too and contains a vast array of beautifully presented, stunning photographs, some of which are presented as absolutely huge prints. Many are panoramas some of which must be 8 or 9 feet wide, and would make a commanding presence on any wall. I was informed that these are printed on Fujicolor Crystal Archive paper which, under the discrete overhead halogen lighting, makes the pictures positively glow set against the black gallery walls, so much in fact  some you’d swear they were back lit. No matter what your taste in pictures you can't help be but impressed by some (if not most) of Mr. Lough’s collection of photographs.

Photographic Repertoire

His repertoire comprises the great American wilderness, and many of his shots are the classic scenes that adorn many books and walls of countless other galleries, and include images of Yellowstone’s Mammoth Hot Springs, Grand Tetons, Mesa Arch in Canyonlands, Antelope Canyon, the Grand Canyon, Monument Valley and so on. However, what makes Rodney Lough just that little bit different, is that he does try to make his views unique and every one of his images are just about as perfectly composed as you can get. His panoramic shot of the Mesa Arch sunrise demonstrates this IMG_0939perfectly where he omits (crops?) the foreground cliff edge from the frame and creates a panoramic view of the arch that I’d not seen before and found most appealing. This perhaps, was my favourite of all his pictures, but I guess that may be because it’s one location I’m pretty familiar with and have shot myself. There are many other panoramas and one other shot that caught my eye was a foggy scene of an old weathered, leaning outhouse, taken amongst the grassland in Square Top Mountain National Forest, Montana, entitled “Can You Spare a Square”. It was so sharp you can literally see every blade of grass. He does profess to venture deeper into the wilderness than most other photographers do, and his YouTube video here portrays him as a “Modern day explorer and photographer”. While that moniker may be a leaf out the Peter Lik style of marketing, it would certainly seem that he works hard for his art. If you like the great American wilderness, which I do immensely, then you’ll enjoy his pictures.

Equipment & Print Quality

Rodney shoots large format using an 8 x 10 Arca-Swiss line camera, with either a 150mm f/5.6 Schneider or a Super-Symmar XL lens or a Fujinon 300mm F5.6 lens. The large format certainly captures an extraordinary amount of fine detail which can be seem in his photographs. In some cases the pictures were shot with a P65 Phase-One digital back, but I wasn’t able to find out how his panoramic shots were done, and whether they have been either cropped from 8 x 10’s or stitched. The gallery assistant told me that the pictures are largely untouched, and not ‘photoshopped’, but that was clearly not the case in some. As I mentioned above, many are over saturated to the point of looking slightly unnatural, but I guess at the end of the day this is just a matter of personal taste, and this look certainly seems to be the ‘norm’ and popular amongst USA landscape photographers, and something I have laso been quilty of doing myself. One or two of the pictures were a tad over sharpened too, and just look too detailed. On close inspection clear, fine, bright halo’s around some mountain skyline edges could be seen; his shot of Kings Canyon NP, California being one of them, or though to be perfectly honest you’d never ever notice this from any reasonable viewing distance, but you just know how we other photographers like to be pixel peepers. I just couldn’t resist looking real close.

To Buy or Not?

IMG_0929

I was told by one of the gallery assistants that Rodney Lough is an old acquaintance of Peter Lik, and without doubt he has taken a page out of his book and is following similar footsteps with the big, expensive, high profile galleries. I can’t see that approach ever being successful within the UK and even in the US it must be a huge financial undertaking. That sort of real estate in prime tourist territory near the famous Pier 39 of the San Francisco wharf area and the gallery conversion must have cost millions. However, no doubt once you’ve made your name it can potentially reap a huge financial reward too. As you’d expect his pictures, which are generally limited editions of 500, don't come cheap either, starting at around $1000 for a small print, and going up to well over 8 or 9 times that amount for much larger framed prints. One wonders who just can afford these, certainly not the casual tourist like me of whom the majority of the visitors appeared to be. Then again,  Americans, certainly wealthy ones (and of those no doubt there are quite a few), seem much more liable to invest large sums for what to they may deem highly collectable and desirable items than us frugal Brits. You’d also need a pretty big house or office with capacious wall space to be able to hang such prints, and most Brits do not posses such wall space, whereas the much bigger American properties are much more suited to large works of art. The prices were well out of my league, although several pictures I admired immensely, but I would perhaps would be tempted by a book; sadly there were none to buy.

IMG_0959If you have any interest in American landscape photography or even just photography and are visiting San Francisco, then the Rodney Lough Gallery is well worth a visit. For me it was one of the more interesting attractions near Pier 39, and one I found most inspiring, but then again I'm a photographer too.

Location

The Rodney Lough Gallery, One Jefferson Street, San Francisco, CA 94965.

Telephone: toll free at (877) 274-3739 or at (415) 399-9959.

Resources

Tuesday, June 14, 2011

When Lightning Strikes

Equipment Review

Murchison   Jun 2011 2020

I've often admired some amazing photographs of lightning and although I've read plenty on the technique of how to achieve such shots I've never had any success myself. All my attempts have been a complete disaster even when I've know the shutter was open when the lightning flashed.

It seems the generally accepted technique is to put the shutter speed on Bulb and leave it open for a certain length of time. Of course it goes without saying that you need to have your camera securely mounted on a sturdy tripod and use use a cable release too. However, even after that, picking the right exposure can be tricky depending whether your shooting in the day or night and knowing where to focus can be problematic too, especially if it's dusk or night and you have some foreground interest too. Many of the shots you see online are purely of the lightning, but as landscape photographers we wish to incorporate other aspects of the landscape within our composition, not just the lightning.

The Lightning Trigger

About a couple of years ago I became aware of a device called the 'Lightning Trigger' made by a company called Stepping Stone Products, LLC in Colorado. Thisfirst came to my attention while watching Steve Kossaks DVD on Death Valley. Steve also posted a review of the Lightning Trigger on the Luminous Landscape web site which can be viewed here. The Lightning Trigger is a small rectangular shaped device, rather similar in size to one of those portable 2-1/2" hard drives, that slots onto the hotshoe of your DSLR and has a cable that plugs into the remote cable socket. It comprises a sensitive optical flash sensor that responds to lightning flashes which it can supposedly detect at distances of up to 20 miles away in day light and 40 miles at night. Often our eyes and brain can only visualise a single flash of a lightning strike, but each strikes can last several hundred milliseconds and comprise multiple strikes occurring around 40 milliseconds apart. The Lightning Trigger depends on this and reacts to the first strike and opens the shutter enabling following strikes to be captured. All this depends on the reaction speed of the device and how quickly your camera responds, but most cameras react within 90 milliseconds and some are almost instantaneous.

I must admit I was sorely tempted by such a device as I have been travelling backwards and forwards to the Lake Albert region of Uganda for the last 4 years, and where we are often treated to spectacular storms during the rainy season. However at $329 and only available from the US, by the time I'd paid VAT and import tax this would be a very expensive purchase indeed. My desires to own such a device were therefore put on hold.

The AEO Lightning Strike

imageJust over a year ago I found a very similar device available on eBay called the AEO Lightning Strike. This was developed by a father and son team of the Adams Electo-Optics Photo Company and for all intents and purposes seemed almost identical to the Stepping Stone Lightning Trigger. Once more, it was considerable cheaper at only $100, which included shipping to the UK. At just over 60 quid at the time I thought this was worth a punt and duly clicked the buy-now button. It arrived reasonable well packaged several days later in a plain brown box containing just the Lightning Strike and one printed page of rather brief instructions. The device was rather plain simple looking affair, housed in a solid black plastic case, with a large on-off button in the centre of the top, with a small red LCD next to it. You have to order a device specific to your camera, so the 8-inch lead on mine had a canon fitting. I wouldn’t say the device looked crude, a little unrefined is perhaps a fairer description, as the remote socket plug doesn’t look the best quality, but with a bit of wiggling around it fits. It’s certainly a solid construction however. The underside has a plastic hotshoe fitting centrally mounted and a cover that houses a 9v rectangular battery compartment. The front a has red plastic screen housing the detector.

First Attempts

Murchison (Jun 2011) 2062

That was last May (2010) and sadly until then the Lightning Strike has sat in my Camera bag waiting for an opportunity to use it. Sadly no storms of note occurred around my home back in the UK, but last night in Uganda, the Lightning Strike was christened. A huge storm passed nearby the rig I have been working on and the distant lightning seemed too perfect to resist. The instructions included with my device suggested using shutter priority and exposure from 1/8 to 1/4 of a second, set to manual focus and focus at infinity. However, I had the rig in my foreground so focused on that, and set the speed to 1/4. However, that resulted in most of my shots being shot wide open at F2.8, which although resulted in the derrick being sharp, the lightning in the distances was rendered a little soft. However, the device worked pretty dam well and I have to say I’m impressed with my first attempts. Next time I’ll try aperture priority and use F8 or F11 if I have something in the foreground. You don’t really have to be worried how long your exposure is going to be as long as you don’t exceed the 30 second limit for Av and Tv modes.

New Models

The AEO Lightning Strike is now only available in version II, which has had a bit of a make-over since my version, and includes a battery and you can fit optional plug-in cables. Sadly with the improvements has come a price hike and it’s now $132; quite a bit more expensive but looking at the many videos on You Tube it’s certainly appears to be a more refined product. The company has obviously met with some success and they now offer 2 additional models, one which includes a pelican case and manual override of sensitivity (LS Trigger Plus), and a professional model (AEO Multi-Trigger Pro) which includes a 10m motion sensor. The aren’t cheap however, and currently retail for $232 and $360 respectively so are probably only for professional storm chasers!

Murchison (Jun 2011) 2076

Alternatives

A similar device called the Strike Finder can be purchased from here, which currently retails at around $125. The site also includes a nice video of you the trigger in action in a real storm and the results it produces. There is also the PatchMaster Lightning Trigger that can be obtained from a mere $107, and they also do a version which includes a sound trigger for $152. PatchMaster products seems to originate from Turkey and I did find a few negative reviews around where they have been dead-on-arrival, but at that price they certainly seem worth a try.

Summary

Murchison (Jun 2011) 2072

I’m very pleased with my AEO Lightning Strike trigger. It works well and my first attempts are quite pleasing. It’s opened up another area of photography for me to pursue and will hold a regular place in my camera backpack from now on. If I had anything to criticize or to say to the makers of these devices it’s the batteries, 9v batteries are an awkward size, and not one we photographers tend to carry around in out kit bags, 4 x AA would be a much better option, but I guess that would take some design changes. All in all there certainly appears to be more choice of lightning triggers around now, making this a more affordable option for the amateur photographer.

Resources

Related Posts Plugin for WordPress, Blogger...