Showing posts with label Lightroom. Show all posts

Thursday, November 1, 2012

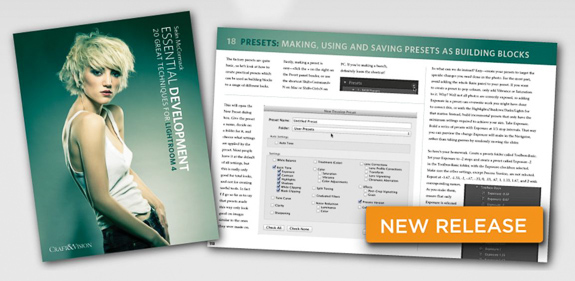
Essential Development - 20 Great Techniques for Lightroom 4

New Book from Craft & Vision

There is a new eBook offering from Craft & Vision entitled Essential Development - 20 Great Techniques for Lightroom 4. It's also by a new author to the Craft & Vision stable, Seán McCormack, who many may recognise from the Adobe Lightroom forums and for his regular Lightroom Blog at Pixeq. Seán has been involved with Lightroom since the early beta versions where his forum activity of attracted the attention of Adobe. He was subsequently invited to become a Lightroom beta tester and has been involved with all Lightroom editions since. Thus he has a well established pedigree as an authority on Lightroom.

I've been an avid Lightroom user since those early beta versions too, having migrated from the original Rawshooter program by Pixmatic (where Adobe acquired the original Raw processing software). In that respect I'm no novice and would probably consider myself an advanced user, so I did wonder whether I'd have much to gain from yet another Lightroom tips booklet. Well, as you'll find out I was quite pleasantly surprised.

Read More >>

Sunday, January 8, 2012

Star Rating your Photographs

Lightroom Star RatingsI recently returned from a once-in-a-lifetime photographic trip to the Antarctic Peninsular where I shot almost 7,500 frames in under 6 days. A phenomenal number of frames by anyone's standard, but as a member of a 73 strong group of photographers my frame count was probably on the low side, and probably very low compared to some I saw. At the end of our trip, during one of the lectures from one the lead photographers and organisers, we we asked to raise our hands if we had captured any 5-star images. The vast majority of the party raised their hands, but I did not. That got me thinking about what exactly constitutes a 5-star image and is what I consider a 5-star image similar to those other photographers? … apparently not so it would seem. Don’t get me wrong, I did acquire many good images that I’m perfectly happy with, but just not quite 5-star images in my book.

Assigning a Rating

Of course when I talk about star ratings I’m referring to the system of being able to assign a rating from zero to 5 stars to a digital image, usually in a DAM (Digital Asset Management) program such as Adobe Lightroom, Apple’s Aperture, or Adobe Bridge. It’s not just stars you can assign either, you can flag a photograph as a pick or reject and also assign colours, but for most the system of assigning stars seems to be the favoured method of rating their photographs. Star Rating ToolbarI’ll refer to Adobe Lightroom from now onwards, as this is my preferred DAM/RAW processor of choice, but it’s similar to the others mentioned above. In Lightroom you can assign star ratings in the Library or Develop modules simply by pressing the numeric keys from 0 to 5 to assign none to a maximum of 5 stars to an image, but if you prefer you can us the mouse to click on the star icons in the toolbox to achieve the same end (Tip: you can show or hide the Toolbar by using the T quick key). Rather interestingly, using keys 6 through to 9 will assign the colours red, yellow, green or blue to the images respectively, although there doesn’t appear to be a quick key to set the last colour purple. Thus it is possible to rate an image, albeit rather quirkily, from 0 to 9, although I don’t know any photographers that do this. Note that if you also hold the shift key down whilst pressing a numeric key, the image will be assigned the appropriate star or colour rating and then next image displayed, thus allowing you to move through your image collections whilst rating them. You can also use the right or left square-bracket keys to promote or demote the ranking of an image.

The Rating Process

For most photographers a simple system of assigning 1 to 5 stars seem to be the most common form of rating, with no stars left for unrated or un-judged photographs, 5 stars reserved for the very best or portfolio quality images, and ratings in-between for images of varying quality. But what actually constitutes a portfolio image, and what distinguishes a 3 star image from a 4 star image? Do photographers simply apply a varying degree of quality assignment from visual inspection on the computer monitor? Well talking to several, it would seem that’s exactly what they do. However when asked it seems very few could elaborate in any detail how a 2 star image would differ from a 3 star image, or a 3 star from a 4 star image. Poor images and the very best images are probably the easiest to rate, but those in-between are not quite so easy and it seems that most ratings rather depend on how the individual photographer assesses the image on screen at one particular moment in time and then simply prescribes an arbitrary value of 0 to 5. Of course there is nothing wrong with this type of assessment as this system obviously works and perhaps is all that is required for many photographers. Our poorest and very best images are usually the most obvious to us anyway, but how often have you revisited an image at a later date and changed the rating? I’m sure almost all of you have done that at some time, and perhaps down graded images and upgraded some images in a later reassessment. It’s clear that rating images can be a very subjective, emotional and perhaps an emotive process for photographers.

As digital photographers, let’s be honest, we all tend to shoot a vast amount of images, far more than were ever acquired when we shot film, so it’s no surprise that sometimes good images can be often overlooked or missed out on our initial assessments. A common process is to find the first good image in a sequence of similar images, and commence work on that one, without perhaps, fully inspecting the rest within the sequence. I know I’m frequently guilty of this myself. Time constraints, computer processing time, library size, the sheer abundance of similar images and good old human nature lead us to a propensity in selecting that first good image. Often that first good image tends to jump out at us on screen too, but it may not necessarily be the absolute best image in the sequence. I remember attending a talk once, from a well known British wildlife photographer, who stated that there will be only one 5-star image from each shoot, that his 5-star image he keeps and then he deletes the rest. I didn’t believe him for one minute and although he may be profoundly adept at selecting the one that sells, it’s only human nature for us to change our minds at some point, and surely there may be other images that suite other commercial purposes, even if not quite as good. Perhaps it was just his stage bravado and showmanship talking.

My Rating System

So if not a pure numeric quality rating of zero to 5, then what else? Well I like to rate pictures according to what their use may be together with the actual quality of the image, so my star ratings encompass a range of criteria. For instance I may have an image that I really like that is a great composition, with good light and mood, is well exposed, but perhaps not perfectly sharp or the focusing is slightly off. I know the image is not high enough quality to make a large print, but it may be perfectly suitable for or an A4 or 10 x 8-inch print, and if not good enough for that it may perhaps produce perfectly adequate 5 x7 or 6 x 4-inch prints. I wouldn’t want to delete the image just because it’s not of the absolute best quality. Some of my images I know are probably not good enough for printing at all, but they have a sentimental value or may perhaps be suitable for use in and AV presentation or video, where I don’t need anywhere near close to the capture dimensions as it will be only ever displayed on a computer monitor, or in a video at only 720 resolution or even on an iPhone. This then, is the rating system I now use that works for me:

  • No Star – Unrated: Images that have not yet been evaluated.
  • One Star – Neutral/Keepers: Images that are neither good enough for slideshows, or printing, nor flawed enough to be deleted. These may have sentimental or documentary value or snapshots I just whish to keep.
  • Two Star – Good: Images good enough for 6 x 4 or 5 x7 prints and slide shows at 100%, but perhaps not really good enough for full size prints at 300 dpi.
  • Three Star – Very Good: images I like that that are considered to be very good, are technically sharp at 100% and and can be printed at A4 or 10 x 8 in without loss of resolution.
  • Four Star – Excellent: Images I like, think are really good, are sharp at 100%, are technically and compositionally very good to excellent, and good enough for full size prints at 300 dpi.
  • Five Star – Portfolio: Portfolio quality images that I consider are my best photographically and technically and are suitable for extra large prints (24 x 30-inch) and of commercial or exhibition quality.

My rating system has evolved over several years using Lightroom but is now part of my regular workflow, however many (most in fact) of the images in my Library still have zero stars (as yet) and remain unrated. I tend to skip to my better images, rate those and process those images first. In an ideal world I’d return to evaluate, cull or rate all my zero star images, but in reality I know that’s a pipe dream as I know for me it will be impossible to ever achieve that. Hard drive space is relatively cheap these days and as long as my Library size doesn’t effect the performance of Lightroom then I won’t waste an excessive amount of time on trying to cull all the redundant images. Obvious inferior images, those out of focus, badly exposed, and those beyond redemption I may skip at import, or cull immediately after import, but I don’t worry about leaving a huge amount of unrated images within my library folders. I will however, generally try to apply some basic keywords to a shoot (folder), then even the zero-star images may have a chance appearing within a future subject search and may of course provide some pleasant surprises. I tend to use the pick and reject flags after an initial import to highlight the good and the bad, and then apply star ratings to the picks and delete rejects.

You’ll notice too that I don’t use colours for ratings either. I use colours to denote different file types, HDR and panoramic images, but that’s just me. I know some photographers use colours for portfolio shots, or for certain clients or commercial ventures, and to this effect, colour labels seem well suited. I do like the way you can specify your own colour label set in Lightroom and then when you hover your mouse pointer over the each colour in the toolbar, a description of your setting is given in the tooltip; I only wish you could do the same for your star ratings.

Differentiating my 3 star from 4 star images is probably the most subjective part of my system. I may have some images that (to me) possess a wow factor visually but are technically flawed which limits their usage, so they may get down graded to 3 stars, others may be technically perfect but lack a wow factor and but may still achieve 4 stars since they are capable of being printed at large sizes. Portfolio images are usually obvious, and for me they must have a wow factor. There are many times I've thought I have captured a wow image only to find image deficiencies prevent it being rated with five stars once assessed on a computer screen. Thus I have a limited number of what I consider true portfolio images. I’m probably a harsh critic of my own images and perhaps lack a bit of confidence in my own abilities but that’s just me. However I do re-visit library folders occasionally to review my 3 and 4 star images and I sometimes find the odd 3 star image I think now perhaps now worthy of 4 stars or vice versa.

Blog - Antarctica Template

Five Star Images

So that brings me back to my Antarctic shoot and why I haven't rated any of my images as 5-star (yet!). Well, I guess I addressed some of the reasons in the paragraph above. I did acquire many good images, and many that I like and that I’m quite pleased with, but for me none of them just quite possessed that wow factor and some fell short on image quality. As a collective I think they look good (you can judge for yourself by visiting a gallery of some of my favourites here), but to me there are no individuals that really stand out as 5 stars for me. It’s also incredibly easy to be wowed by such an amazing location as Antarctica as it is indeed one of the most impressive places on planet earth. I looked at many Antarctica images prior to my visit, many which then I really thought had that wow factor, but now some don’t seem quite as impressive since I’ve been there and attempted some myself, but I guess that can be said when you’ve photographed any iconic location. The old idiom, “familiarity breeds contempt” often springs to mind, but it’s often the place, not just photograph of the place that is the wow factor, and that certainly rings true for Antarctica.

That aside, I think perhaps many of my fellow shipmates perhaps rate their 5 star images more equivalent to how I rank my 4-star images. For me 5 stars must remain “the very best of my very best” and something I feel is quite special.

Summary

Rating your photographs is a very subjective and emotive process. There is no one correct system and what works for one person may not for another, so what ever you have developed may probably be the right system for you. Remember also that ratings don’t just have to be on photo quality or a “marks out of 10” system for an image, but can include other criteria such as how an image will be used. The key is to define a set of rating criteria and try to be consistent in your method. Occasionally think about revisiting and re-evaluating some of photographs from time to time, check to see if you missed some hidden gem, or been too harsh or lenient with others, you may just get some surprises.

If you have an interesting way of rating your pictures leave a comment and let me know.
Sunday, January 1, 2012

Lightroom 4 Beta Soon ?

Lightroom 4 Beta

Lightroom 4 Beta to be released soon?

I was recently on a Photo workshop with a well known Lightroom beta tester who also writes books on a particular aspect of Lightroom. He let slip his new revised book on Lightroom 4 is set to be delivered to his publisher in February 2012 and that we should seeing a Beta version of Lightroom 4 released very soon. He also intimated that there may be a few surprises in store especially with the Lightroom user interface, but he was pretty tight-lipped about exactly what those surprises would be. He had a beta version of LR4 on his laptop but of course we didn't get to see it! He indicated that the released beta version would probably only contain around 60% of the functionality of the final release version so we can expect additional functions to be included at release time.

The Evidence

Other glimpses of a beta version have been observed on the web also with Sean Reid’s review of the Fuji X10 on Luminous Landscape where the RAW files were apparently converted in a beta version of Lightroom. Also keen eyed followers of Matt Kloskowski’s Lightroom Killer Tips, have spotted a files called LR_4.0_796371_osx10_Release_Installer.zip and LR4R15ReleaseNotes.pdf" in his video release on December 12th 2011, so make of those what you will. Perhaps the final release is closer than we think although I somehow doubt that.

Of course, programming new features, and especially debugging and refining them even after beta testing can be a tricky and time consuming art, so don’t be surprised if the time fame gets extended, but it certainly looks also we should be getting a beta version sooner rather than later.

What New Features to Expect?

The question now of course is what big new features can we expect to see in LR4. Judging from comments made by Jeff Schewe in the recent video release "From Camera to Print & screen" from Luminous Landscape, soft proofing (much to Jeff’s seemingly apparent annoyance) was dropped from the LR3 release at the very last minute, so I’d fully expect it to play a significant role within LR4. Soft proofing was a pretty major part of my wish list for Lightroom 4 as I still have problems getting my prints to match the screen version and I know many other photographers still do too. My wish list (which can be seen here) also contained GPS support, a keyword manager,  face recognition, and improved cloning and healing tools to name but a few. Certainly the later seems to have been a firm favourite around the forums together with improved local adjustment tools to include vibrance, white balance,  fill light and individual HSL controls. There’s a multitude of GPS devices around now too so that may just have caught the LR boffin’s eyes, but it’s certainly not on everyone’s list. There have also been many requests to add Photo-stitching for panoramas and HDR blending for HDR, but these require computational intensive algorithms and personally I can’t see them being included in Lightroom as they seem more suited to Photoshop.  Face recognition is popular in many other photo-packages now including Lightroom’s main rival Aperture; I’ve tried it and it’s a very useful too, so that would be a great addition to see.

Scott Kelby posted his wish list on his blog site in August which of course got a lot of attention and enough comments were left to justify another article on the most popular feature request for Lightroom 4. He also mentioned that the Lightroom developers were listening, so I wouldn’t be surprised if some of the most popular features request are included.

Let's hope there's not long too wait.

Tuesday, January 18, 2011

Nik Software Announce Silver Efex Pro 2

Software Release

image

Yesterday Nik Software, the makers of several well known Photoshop plug-ins announced the impending release of version 2 of their highly popular black & white conversion software Silver Efex Pro. For those of you who don’t know Silver Efex Pro offers an All-In-One workflow to convert your RAW images to monochrome. The program can be run from Adobe Photoshop or accessed from within Apple Aperture or Adobe Lightroom RAW images processors. Not only does it provide superb B&W conversion, but offers a multitude of accurate film emulations, toning, grain, vignettes, burning and the ability to add local adjustments via Nik’s rather clever U-point patented technology.

Version 2 promises to be just as popular, and whilst improving on many current features with new improved algorithms, many new features have been added such as a History Browser, new Fine Structure, Soft Contrast, Dynamic Brightness, and Selective Colour, and it can now add Natural Image Borders. There’s also support for full 64-bit processing.

You can pre-order Version 2 from the Nik Software website which is currently offering a 10% discount. Version 2 is to be released on the 11th February, but if you purchase version 1 now your upgrade is free.

The full price is to remain at $199, which is pretty expensive for just a plug-in. However, if you’re looking for a one-stop quick monochrome conversion facility with realist film emulation and more, you be hard pressed to better Nik’s offering. The u-point local adjustments work very well, but the interface in version one was a tad clunky in parts. You can download a 15 day trial of version one from here. Lets hope the version 2 delivers the refinements Nik promises.

Resources

Tuesday, August 24, 2010

Lightroom 4 Wish List

Software EDITORIAL

Lightroom4

Now that Lightroom 3 has been out for a while and is already in it’s second iteration (the current version being 6.2) it would seem that some of the regular pundits have been turning their thoughts towards what may be included with Lightroom 4. Scott Kelby recently posted a rather interesting blog on features he would like to see in version 4 and that got me thinking what would be in my top ten wish list. Scott’s article was pretty thorough and I thought and covered most of the bases. Plus, being in a position he is within the industry, it would seem that Adobe are already taking note. His article also provoked quite a response. You can read the original here and the follow up Wish List Comments here.

I of course, have absolutely no clout with Adobe what-so-ever. So apart from posting my wishes here in the vain hope that someone from Adobe may, by complete chance, happen to stumble upon them, I think getting my wishes fulfilled are pretty dam remote! Nevertheless, here are my top ten in order of preference:

  1. Soft Proofing: if it’s one thing I still have major difficulty with it’s getting my prints ‘just right’. If you read the web posts I’m not the only one, there are thousands of others out there who, even after profiling monitors and papers,  still find achieving  the perfect print a bit of a dark art. This one’s a no-brainer and way out in front for me.

  2. GPS Support: as a landscape photographer I’d love this feature. Pretty soon all DSLR’s will have GPS built-in. I currently use Jeffrey Friedl’s Geoencoding Plug-in for Lightroom which, even by his own admission, is a tad clumsy due to the current LR plug-in architecture, but does work quite well. This enables locations to be imported from a GPS device or simply tag locations from Google Earth, but requires a bit of juggling to get this data back into the LR catalog.

  3. Key Word Manager: I haven’t seen many requests for this and I don’t really know why. Key-wording is one of those necessary evils. We all know it should be done, but managing long lists and hierarchical keywords in a little side panel is a clumsy affair. They made the new import dialog into a huge pop-out module (which wasn’t really a critical feature in my opinion), so why can’t we have something similar for managing key words?

  4. Improved Local Adjustment Tools: these currently contain Exposure, Brightness, Contrast, Saturation, Clarity, Sharpness and Colour. But why not Fill Light, Recovery and Vibrance, or even go the whole hog and give us a local Tone Curve adjustment too.

  5. Improved Slide Show: I currently use a third party product (ProShow Director) for my AV requirements, and whilst I don’t expect Lightroom to provide that level of sophistication, the Slide Show module as it stands is a little basic. More layout capability, with multiple pictures per slides, different backgrounds, more text features, Ken Burns zooming and panning and a few different transitions are an absolute must. Syncing to music would be nice too plus the ability to use several music tracks in sequence.

  6. Photo Book Services: Scott Kelby mentions this is the sole feature he uses Aperture 3. But I certainly don’t want to be tied to a photo book publishing feature that ties the user to one service like Apple does. To me this is an ideal feature to be added to the Publish Services feature, so hopefully we’ll see services like Blurb, fotobook and many others added here.

  7. Face Recognition: enough said, it’s already in Aperture and we’d all use this for sure. Surely adobe couldn’t afford to leave this out...could they?

  8. Improved Spot Removal Tool & Clone Stamp: these are some of the few features that still require me to leave Lightroom. I’d really  like to see the Spot Removal tool developed into a proper healing brush, so annoying wires and TV aerials can be cloned out without a round trip to Photoshop.

  9. Photo Stitching: the ability to make panoramas and stitch photographs within Lightroom.

  10. Improved Interface: I like the Lightroom interface very much, but it needs to be a little more adaptable. Some of the side panel features are too small when restricted to a narrow panel. A  pop-out/expand mode feature may suffice. And please, please, Mr Adobe, do something about the dreaded little triangle in the far left and right margins. I’m forever clicking in there by mistake thinking it’s the scroll bar and hiding my panel. Scroll bars should be on the Outside!

Well that’s my wish list for now. Now tell me yours!

Thursday, April 29, 2010

Lens Correction for Lightroom 3

LIGHTROOM News

Having watched Terry White’s excellent video of  some of the new headline features in Adobe Photoshop CS5, one of the functions I really hoped that would be included in the release of Lightroom 3 was lens correction. Well now it’s official, lens correction will be included. Yesterday Adobe released a You Tube video from Production Manager Tom Hogarty who presents a walk through of the Lens Correction Features within CS5 and states that these features and more will also be included within the final release of Lightroom 3.0.

In addition to manual controls to correct for geometric distortion, vignetting and chromatic aberration the lens correction in LR3 will include profiles for many Canon, Nikon and Sigma lenses. The video features one of Canon’s most popular lenses the 24-105m f4.0 L lens, which is good news for me as it’s on my 5D mark II most of the time. The profiles will also be included in Adobe Camera Raw 6 (ACR) Photoshop plug-in which presumably will be released around the same time as LR3. Adobe will also be providing a free Lens Profile Creator Tool, which will include a number of test charts for you to photograph so you can create profiles for any lens.

This is great news for Lightroom photographers and at last we will no longer have to create an intermediate file to straighten those horizons and bowed verticals and correct for perspective. I must admit being to having been a tad disappointed with the new features in the original release of LR3 beta One, and not quite overwhelmed by Beta Two either. However, lens correction is one of those features that was pretty high up on my wish list and I’m sure there’s lots more surprises to come. Now I can’t wait till the the official release. let’s hope it’s not too long!


Resources

Tuesday, March 23, 2010

Adobe Release Lightroom 3 Beta 2

Lightroom News

Lightroom 3 Beta 2

Adobe today have surprised everybody today by releasing a Beta 2 version of their forthcoming Lightroom 3 software. The first beta version was released in October 2009, but I doubt anybody expected a further version before the final release. You can download the new Lightroom 3 Beta 2 version here.

Almost simultaneously with the Beta-2 release the usual first-looks, video clips, reviews and resources have appeared on the web from those in-the-know and the regular Adobe insiders.

Adobe have stated:

“We're offering a second public beta of the next release of Lightroom to give you a chance to preview the progress we’ve made on the new features and enhancements in the upcoming version. It's an opportunity for you to evaluate a select portion of the new features planned for Lightroom 3, to help the team discover and address issues if any, and to send feedback that the Lightroom team can use to make Lightroom 3 an even better digital darkroom and more efficient assistant for you”

However if you’ve had cause to visit the Adobe Lightroom 3 forums recently and viewed some of the criticism there, perhaps that, and I suspect the release of Aperture 3 by Apple may have played a part in this unexpected release. It may be that Adobe are buying some time due to Aperture 3 and I would hazard that an anticipated June release of the full LR3 probably looks unlikely now.

That asides there are a few new exciting features on offer that I’m sure will keep the bulletin boards and forum contributors buzzing for a while. Probably the most headline grabbing of these is functionality for tethered shooting; however it’s only for a limited set of the upper market professional Nikon and Canon models; Sony and others will presumably have to wait, but I can see this being a controversial point for starter. One other much requested feature now included is support for Video files, which can be added to your library, rated, filtered, and even made into collections. Some of the other improvements include:

  • Improved performance and faster importing and loading of images.
  • Full implementation of Luminance noise reduction.
  • Further improvement of Colour noise reduction.
  • Additional functionality to Watermarking.
  • Improved folder browsing with the ability to dock folders to make it easier with long file hierarchies.
  • Ability to use point curve editing in the tones curves like Photoshop
  • Additional criteria in smart collections
  • Sharpen brush can be set to blur

These are just a few of the enhancements in LR3B2 with much attention paid to the engine under the hood, with a lot of the bugs ironed out focus placed on improving performance and speed.


SOME First IMPRESSIONS

ToneCurve One of the much requested features on the Adobe forum was the ability to edit the Tone curve in the same manor as Photoshop. Well now it’s included, and by simply clicking on the Point Curve icon at the bottom left of the Tone panel, editing is switched to Point mode. Photoshop fans will be in familiar territory, but I for one for one, found Lightroom’s Tone sliders far more intuitive and easier to control.

I’ve only briefly toyed with LR3B2, however, as PC user (not MAC) I’ve really noticed a significant improvement in performance.  LR3B1 I found prohibitively slow, so much in fact I seldom used it for anything but trying out the new functionality. This was a common theme amongst PC users reporting to the Adobe forum; it was almost if LR3B1 release was aimed specifically at MAC users, where it’s performance seem admirable. LR3B2 is really quite lively on a PC, rendering is much faster, so is zooming, and even switching between modules seem much more responsive. Mind I’ve yet to test this on my large desktop library back home.


Resources

If you want a quick run down of the new features and functionality of LR3B2 a good starting point would be to checkout the Adobe TV video walk-through by Julieanne Kost Julieanne Kost here, which as she so often reiterates, is excellent! If you want an more information check out the one by Ian Lyons at Computer Darkroom. Other resources can be found listed on Tom Hogarty’s Blog, and there’s another video from Terry White here.

Go ahead and download your free copy now!

Tuesday, February 2, 2010

Lightroom 3 to be released in May 2010?

Software

image

If you mosey on down to Michael Reichmann's excellent Luminous Landscape web site you’ll see he has announced a Winter Cheer-up competition. He’s giving away 10 copies of the full version of Lightroom 3 when it is to be released. Actually he’s not giving it away, nor is it much of a competition, you simply have to buy and download one of his video tutorials between now and May 1st to stand a chance of winning.

Michael is an Alpha tester for Lightroom so you can bet your bottom dollar he is one of those “in-the-know” as to when LR3 will be released. If his competition finishes 1st May, my guess that will be the intended release date for LR3 or very soon after.

Thursday, November 5, 2009

Lightroom 3 Beta Release - First Impressions

Software Review

image I was quite surprised, like many others no doubt, to find out last Friday that Adobe had released a beta version of Lightroom 3 just 15 months after the full launch of Lightroom 2. They certainly managed to keep that one quiet! Lightroom has become my software of choice for DAM and RAW processing and I’ve used it from the very first beta release of version 1, so I was very keen to try out the new LR3 beta version. Some of the new features touted by Abobe are as follows:

  • New performance architecture, to allow for growing image libraries
  • Noise reduction for high ISO shots
  • Watermarking tool
  • Portable sharable slideshows with audio—designed to give you more flexibility and impact on how you choose to share your images, you can now save and export your slideshows as videos and include audio
  • Customizable print package for custom print layouts
  • Film grain simulation tool
  • New import handling dialog
  • More flexible online publishing options including ability to post images to sites such as FLICKR

Needless to say, after only a day or two there are already a substantial number of detailed reviews, first looks, videos and blogs (some of which I listed below) out there already. Most of these I suspect, have been posted by members of the Alpha testing group who are able get their hands on new Lightroom versions long before the general public do. Funnily enough I've only seen Michael Reichmann admit to being an alpha tester.


First Impressions

Firstly, I've only had a weekend so far to look at LR 3 beta so these are my very first impressions.  When I first saw the list of improvements and new features from Adobe I can't deny I was a tad disappointed. Where were Soft Proofing, Lens Distortion Correction, Perspective Correction, and a decent Keyword Manager? These were all around the top of my list of improvements, and plenty of others from what I gleaned from the various forum and web postings. I can't say Film Grain Simulation, Exporting to Flickr and Watermarking were anywhere near getting on my list, so I really can't understand why any time has been spent on these rather trivial features. However, this is by far from the finished package, and like the release of LR2, I can only assume they are saving the best till last. At least I truly hope so. Lets take a look at some of the headline changes.


New File Import Dialog

Well it's called a dialog box, but it's long, thin, very dark, has rounded corners, has a horizontal work flow and dims the rest of your screen when it's opened. It's quite unlike any dialog box I've seen before. In fact once expanded, it bears a more resemblance to a Lightroom module rather than a dialog box and has side panels and even a flourish! So just what is going on here?

image

Well there is more functionality perhaps, but I'm really not sure about the way it's been presented. What's the old adage "If it aint broke , don't fix it". There was absolutely nothing wrong with the old import dialog box in LR2 and I wasn’t aware of any significant proportion of users reporting problems with it. It performed admirably in my book so I have to confess I'm rather surprised time has been spent on developing this. You can however, you can have far more thumbnails visible (albeit with some weird vignette applied) and zoom in on photographs before importing them, which is perhaps a good thing. However, the way this is now presented, it's now surely an Import Module, and is no longer a dialog box. If that’s the case may be we should be seeing it as proper module and listed on the Module Picker.

I can understand why Adobe have gone with the dark colour, so you can judge your colour photographs against a similar background before importing them. However if it's going to be a dialog box, make it look like the others please, remove the stupid corners and make it match the other dialog boxes, lets have some continuity through out LR. As presented here it now looks very much like a bolt-on application and I truly hope the rest of the dialog boxes within LR are not going to end up looking like this.


RAW Processing

We’re promised faster and better RAW processing as the desmosaic engine for LR3 has completely been re-written from the ground up. However, being a PC user it’s not easy to determine, as this version seems optimised for Macs not PC’s. Just read the feedback on the forums already and you’ll see what I mean. Fast on a Mac, slow on a PC. I guess that’s understandable as I’m sure LR3 Beta is probably developed on Macs and then ported to PC’s, and who can blame Adobe when you have the awfully sluggish Windows Vista to deal with. 

My primary catalog has in excess of 100,000 photo files now, and it’s got to the stage where the size of the catalog has effected the speed of my workflow even on a quad-core 64 bit system running at 3.2 gHz, so speeding up my catalog is another key feature I was looking for. Unfortunately you can’t import your existing LR2 catalog into LR3 beta so I can’t test this feature. To import files and preserve your existing LR2 modifications you have to first save your edits as XMP side car files (Save Metadata to File from the Metadata menu in the Library module or via CRTL+S) and then read them back in once you imported the files into LR3 beta (Read Metadata to File from the Metadata menu in the Library module or via CRTL+R). Unfortunately there is a bug that prevents the user importing more than one folder at a time. Thus it’s highly unlikely I’m ever going to import my whole catalog folder by folder to test this feature.

I’ve tried a few side by side comparison of how LR3 beta processes RAW files as compared to LR2 and so far I can’t tell that much difference. On a few it definitely seems better, much smoother, but oddly quite a few of my pictures were rendered noticeably darker but I suspect this is something to do with a change in the way post crop vignetting works. It’s a bit too early to for me tell.

image

If you import a picture processed in LR2 you will see a little grey alert icon above the histogram on the left-hand side in the Develop Module. To take advantages of the the new LR3 beta process engine and controls such as the new noise control, and new post crop vignetting, you’ll need to click on this to upgrade. You can also choose which process version to use from Settings | Process Version.


Noise Reduction

The Colour Noise Reduction algorithm has been re-written for LR3, but if you elect to use the LR3 beta process engine you’ll find the Luminance Noise Reduction option greyed out. The latter I guess is still work under progress.  The Colour Noise Reduction is supposedly greatly improved, with criticism of the old version being that it tended to soften your image too much.  There is a noticeable improvement with the Colour Noise Reduction but I, like most I suspect, have used well established 3rd party products (in my case Noise Ninja Pro) which have provided sophisticated results and provide the ability to apply selective noise reduction to different parts of the image. Unless the final release of LR3 intends to add noise reduction to the brush tool I see little here to threaten the wide use of the third party products or alter my existing noise reduction workflow.


Custom Print Package

Lightroom 3 allows custom print layouts which gives much more control over your print layout, and you can even add colour backgrounds if you wish. This is some welcome additional functionality, but what we really want is the ability to add custom borders, frames, mattes and text.


Watermarks

Watermarks have been improved..a little. You can apply text or graphic and adjustable size, position, and opacity.


Other Improvements

At long last you can now choose to backup your catalog when you exit Lightroom rather than the next time it starts. You can sort Images by aspect ratio now too. You can also now create a collection directly within a collection set by simply right-clicking on the collection set, and you can now select to have an icon displayed on the grid thumbnails to indicate that image is part of a collection. One other point that pleases me is that filters are no longer ‘sticky’ to a folder or collection. Many’s the time I’ve returned to a folder and wondered where many of my photographs were only to eventually remember I had some filter applied. Catalog file optimisation is now selectable from the File menu rather than been hidden. Some of the more popular print sizes have been added to the crop presets, although I’m sure most of us will have already have created our own. You can also export your slideshows as movie files, even in full HD at 1080p. Post cropping vignetting has been modified ability to select either Highlight Priority or Colour Priority, and can produce a more pleasing effect. You can also now add grain to your pictures, to emulate film grain. I thought this a rather odd function to add as it’s normally the realm of Photoshop or third party plug-ins to provide these type of features. May be this is a sign that Adobe are eventually going to add some of the functionality oh Photoshop to LR. I certainly hope so, the less Photoshop the better as far as I’m concerned. There are also many other minor improvements that I’ve not yet had time to investigate.


What other features can we expect?


I guess I’m really hoping that this is not it, as I suspect there are not nearly enough new features to temp the majority of user to upgrade based on this feature set alone. As with the release of LR2 I’m pretty  sure Adobe will have kept one or two barnstorming features for the final release that will tempt even anti-upgrade stalwarts to relent. As Tom Hogarty stated in his Lightroom Journal blog “We're not even close to finished in terms of features”  and this is reiterated in Michaal Reichmann’s review on the Luminous Landscape. I guess we’ll just have to wait and see.


Lightroom 3 Beta Resources

Download Adobe Lightroom 3 Beta from Adobe Labs
Adobe Lightroom 3 Beta Release notes
Lightroom 3 Beta Learning Centre
Lightroom 3 Beta First Look – Luminous Lightroom
Lightroom 3 Beta Tutorials – Juleanne Kost

Monday, August 10, 2009

Lightroom Tip - Panel End Mark Star Ratings

I can't remember where I saw this simple, and very effective tip, but it's one I've found particularly useful so I like to present my particular take here.

I've must admit I've always found the Panel End Mark displayed at the bottom of each panel rather odd. They seem superfluous and in total contrast to the sleek streamlined interface displayed elsewhere throughout Lightroom. In LR1 I found them distracting and removed them completely, however by LR2 I just left them at the default flourish graphic and more or less ignored them. You can easily select others by: Edit > Preferences > Interface > Panel End Mark and can even import your own graphic. I've seen people use graphics of cameras and even a film canister, but that's not for me.


I also like the ability to set up custom colour designations (Metadata > Colour Label Set) for each colour which can be displayed in a handy tool tip when you hover your mouse over the each colour in the Toolbar, but found it rather annoying I can't do this for Star Ratings. After all, Star Ratings are specifically designed to rate your photographs, yet a 3-star rating for one person may mean something completely different to another. I'd certainly like to see the ability to have multiple Star Rating Sets added to version 3 (please take note Adobe).

Well someone out there had the excellent idea of making Star Ratings into a small graphic and displaying them as an End Panel Mark, thus your ratings are always there to remind you. The example I saw was a simple one line for each rating. My ratings however, are a little more complex than just good, very good, excellent etc., so I used multiple lines to convey the precise criteria for each star rating. I created my Panel End Mark in Xara Xtreme Pro (a highly recommended graphics package) but I guess any graphics or drawing package would do. It may take a little messing around to get the right size, but the end result is something infinitely more useful than a flourish! I hope you'll agree.


Related Posts Plugin for WordPress, Blogger...